Monday, February 3, 2014
Saturday, January 4, 2014
2 FOs
This reminds me of a mitt for washing cars. However, when turned right side out, it becomes a thrummed mitten. As long as I have been working with fleece I've wanted to make some of these mittens. This pair took me almost a year to complete. First I ran out of the main color of yarn and had to order a skain. Then I made one too short and and to rip part of it out. In the end they sat in a basket of unfinished projects through the summer and fall until I finally finished them. Whew.
I used the pattern call Thrummed Mittens by Jennifer L Appleby from Interweave Knits Winter 2006.
Another FO to cross off the list! I finally sewed the side seems. This pattern is called Leafy Glen Shell by Liga Leja. I found it in The Knitter's Book of Wool. But this is not made with wool. It's made with Seasilk from my stash. Done!
I used the pattern call Thrummed Mittens by Jennifer L Appleby from Interweave Knits Winter 2006.
Another FO to cross off the list! I finally sewed the side seems. This pattern is called Leafy Glen Shell by Liga Leja. I found it in The Knitter's Book of Wool. But this is not made with wool. It's made with Seasilk from my stash. Done!
Thursday, December 26, 2013
Fix, Finish, Frog, or Forget
After two cups of strong coffee this morning I tackled an organizing project that was hangin' over my head. You see, I get a little corner of the garage for my storage and workspace for my fiber arts. This messy little corner needed an overhaul. I put finished yarn in one bin, raw fleece in another bin, etc. Sadly I had a whole category of "unfinished projects". To think I use to be a one-project-at-a-time girl and now I have a serious case of start-itis. Sigh. Well, I'm going to whittle away at the unfinished projects now. First I have to decide: fix, finish, frog, or forget. "Forget" is to literally throw in the the trash. Sometimes that's the best place for an unfinished project. Today I'm going to start with the easy ones:
A Sea-Silk tank that has already been blocked---all it needs is two side seems and to weave in the ends.
FINISH
A pair of thrummed mittens. The ends need to be woven in and all the little thrums need to be fluffed on the inside.
FINISH
Oh, what was I thinking? The design on this shawl doesn't stand out enough because of the lumpy hand spun yarn. Why waste the yarn?
FROG
Time to get to work.
A Sea-Silk tank that has already been blocked---all it needs is two side seems and to weave in the ends.
FINISH
A pair of thrummed mittens. The ends need to be woven in and all the little thrums need to be fluffed on the inside.
FINISH
Oh, what was I thinking? The design on this shawl doesn't stand out enough because of the lumpy hand spun yarn. Why waste the yarn?
FROG
Time to get to work.
Monday, November 4, 2013
One Mushroom, Many Colors!
Yesterday I attended a class offered by the Puget Sound Mycological Society to learn more about mushroom identification. The whole class was fascinating and now have a better understanding of the processes one must go through to identify a mushroom. The participants brought in various mushrooms to ID. I spotted a grand Phaeolus schweinitzii - a "Dyer's Polypore"! I asked the student who brought it in if I could take it home at the end of class and she agreed. (Thank you!)
Upon returning home I promptly got out my large dyeing pot, chopped the mushroom, covered it with water and set it to simmer for about a half hour. I wish I would have weighed it. I'm guessing it was about 5 lbs. I added some ammonia and used a tin mordant and got the very orange skein dyed in about 1/2 an hour. I had so much dye material left I grabbed by little sample skeins and began adjusting the pH and the mordants. The skeins that turned out yellow had either no mordant (other than the residual tin floating around) or a pre-mordant with alum. Then I threw in some iron and my samples started coming out green! Some skeins I dipped in for 2 minutes to get a lighter color and some I left in for 1/2 an hour. It's amazing how many colors you can get from one mushroom!
Thursday, October 31, 2013
Oh the Horrors!
Striking fear in the heart of all spinners! A Man-Eating Sheep is roaming the neighborhood. Happy Halloween!
Sunday, October 20, 2013
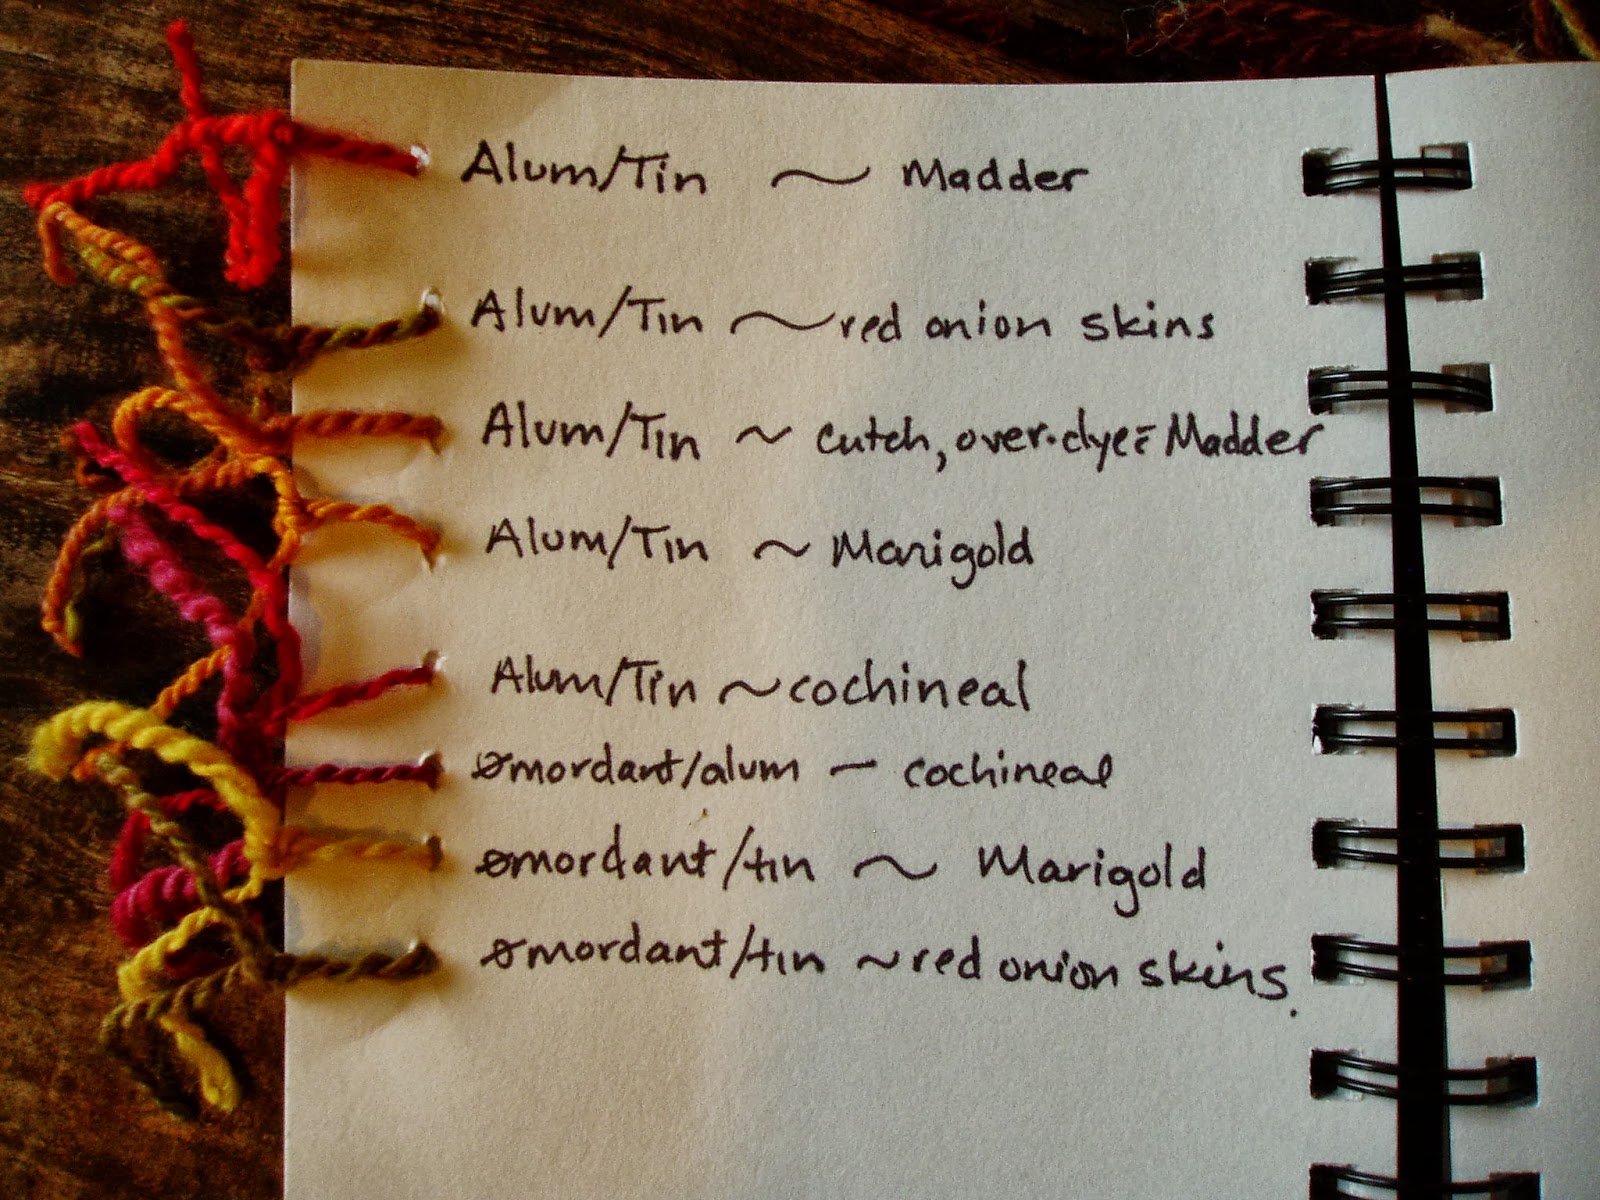
Mixed Mordant Experiment
After I dissolved a teaspoon of tin in some water I let it cool completely. I added the wool and slowly heated the mordant bath until it was simmering. I let it simmer for half an hour and then let it all cool to room temperature. I carefully rinsed the roving. Essentially there was no sudden change in temperature or agitation of the wool to prevent felting.
Next I did the same procedure with an alum mordant. After all the roving was dry I spun singles then plied the different mordant strands together.
The results were mixed. Some of the color variations were too subtle to notices. Others had the barber-pole effect that I was looking for. The yarn that I'm holding above was made with a tin/alum combination yarn dyed with red onion skins.
This pink yarn was make with one strand of alum and one strand with no mordant plied together than dyed with cochineal.
In general I don't enjoy keeping records, but I did take notes this time. One thing that I learned during this experiment is that I really like what tin does to the natural dyes. The brightest colors came from the tin.
As soon as the little skeins were dry, I rolled them into balls and started a knitting project.
Friday, October 18, 2013
Mushroom Dye Class
The mushroom dye class put on by the Puget Sound Mycological Society was lots of fun. Our teacher was Alissa Allen and you can see her website here: Mycopigments.com We tore up a bunch of mushrooms and put them in a pot. Alissa told us about checking the ph to bring out the colors.
There was a display of mushroom and lichen dyed fibers and garments.
We each dyed 2 silk scarfs. This all took us only 2 hours and I was happy to leave prepared to go out on my own and try dyeing with mushrooms. I very much appreciated the handout Alissa gave us that will help my identify the most common mushrooms for dyeing. I'm going to try to get out this weekend for a hike and see if I can find some.
There was a display of mushroom and lichen dyed fibers and garments.
We each dyed 2 silk scarfs. This all took us only 2 hours and I was happy to leave prepared to go out on my own and try dyeing with mushrooms. I very much appreciated the handout Alissa gave us that will help my identify the most common mushrooms for dyeing. I'm going to try to get out this weekend for a hike and see if I can find some.
Subscribe to:
Posts (Atom)